Ward Prime |
|
|---|---|
 |
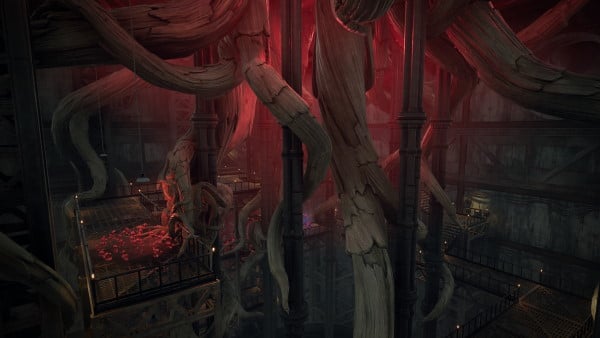
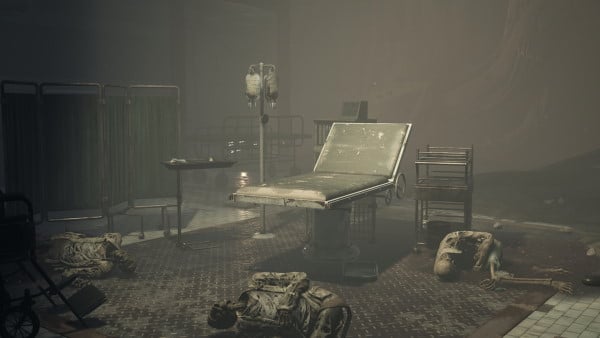
Ward Prime is a Location in Remnant: From the Ashes Subject 2923 DLC. Please see Walkthrough for other areas. A military facility used during the "Dreamers" project
Ward Prime Information
In the 1960s, the US military discovered a large, alien stone etched with symbols along with a wall containing strange runes written in another language. A bright young scientist named Dr. Urik Harsgaard lead a team of researchers who were tasked with translating these mysterious runes. Deciphering the writing told them the stone was called a World Stone and could enable them to travel to other worlds. It also showed them how to create “Dreamers”—humans bonded with powerful entities in these other worlds.
The military set up a facility that would become known as Ward Prime. They began experiments involving the World Stone itself and eventually the human subjects called “Dreamers”. Due to his familiarity with the runes, Dr. Harsgaard took up the role of lead researcher on the Dreamer Project at Ward Prime. Utilizing what he had learned from the strange writing, he found “codes” that could be used to connect the dreamers to other worlds.
Although the initial Dreamer experiments started out very promising, they ended in tragedy, with the loss of life of both the dreamers and researchers involved. However, Dr. Harsgaard was not deterred. Ignoring the advice of his peers and safety protocols, he continued to push his teams at Ward Prime and the remote Wards to move forward with their research. After months of around the clock experiments, they were finally able to make a stable connection to another world using a dreamer.

Ward Prime Walkthrough
Once you enter Ward Prime head down and activate the checkpoint. There are no hostile enemies in the Ward unless you activate one of the rifts, so feel free to explore the area. While in the rift, you'll encounter two types of enemies. The ranged enemies can be killed while the melee enemies will only become staggered but will recover after a short time. In order to unlock the blast doors you'll need to complete the following steps:
- Turn left and head to the end of the corridor. Activate the breach. Run to the opposite side of the building and destroy the root obstruction blocking the door.
- Head down and explore the area. You'll find another breach and a second root obstruction. Activate the breach and destroy the root obstruction
- Cross the door and turn left. There's a window to your right. Climb it to go inside the room. Use your weapon to destroy the book case. On the other side you'll find the Ward Prime Maintenance Key.
- Head back to the first breach and use the Ward Prime Maintenance Key to open the door next to it. This will take you to the generator room. Go inside and use the breaches to destroy all the root obstructions. You'll have to destroy 3 obstruction each one located on a different floor (Use the same Breach for all of them)
- Once you've destroyed all the Root obstructions, use the computer located in the control room next to the generator and activate it. This will restore the power.
- Activate the first breach once again and destroy the root obstruction located to the right of the generator room. Head down the stairs and cross to the other side. Go up the stairs and you'll notice a hole in the wall. Aim through the hole and destroy the lock on the door. The door will open. Head back down pick the items on the room to your right. Open the door leading back to the Medical Bay. Turn left and the door will now be open. On the last room you'll find the Ring of Honor.
- Go outside the room using the ramp and turn right. The computers will now be functional. Interact with the computer in Medical Chief's office to open the door leading to the Medicine Storage, inside you'll find the Ward Prime Keycard.
- Use the Ward Prime Keycard on the door located right next to the Medicine Storage. This will lead you to the Laboratory.
- Once inside the Laboratory, search for the breach. Interact with the breach and head down. You'll find three different Root Obstructions (You'll need to do this three times if you want to unlock all rooms). The Ward Prime Fuse will spawn randomly in one of the three rooms.
- Head to the upper level using the Ward Prime Keycard to open a door leading back to the first checkpoint.
- On the opposite side of the bulding you'll find the Main Bay Power room. Head inside and insert the Ward Prime Fuse and activate the power (Notice that you'll need to interact with the Fuse Box two times. One to insert the Ward Prime Fuse, and another one to restore the power.
- (To unlock the Machine Pistol) With the power now functional, turn left when walking out of the Main Bay Power room and right again past of medical bay stairs. You'll find a small room with two computers on desks with an interactable board game (Cannot play it). This is also the room where you find the Homestead Basement Key, as long as Homestead has spawned on Earth's Rural areas. Interact with the computer located in the middle and press "Enter Password". You'll need to enter the following digits:
- 2
- 4
- 1
- 3
- 5
- 1
- After you are done, press "Unlock Storage Room" and the door to your right will open. Inside you will find the Machine Pistol
- Head back to the first Breach and use the computers right in front of the Blast Doors. You'll be able to open the blast doors now.
- Activate the Breach and destroy the Root obstruction and the quest will be complete. You'll acquire 2.312 Scrap and the Wisdom Trait.
- Interact with the portal and you'll reach Reisum.
Second Pass
Once you complete the Reisum map you'll be teleported back to Ward Prime. Tell Clementine that you are ready and activate the breach behind you. Go inside the portal and the boss fight against Harsgaard will begin. Once you defeat him you'll have to defeat him again as Harsgaard, Root Harbinger.
Once you defeat him, you'll see a short cinematic, the credits will play and you'll be teleported back to Ward 13.
Ward Prime Enemies
Ward Prime Bosses
Ward Prime Notes & Tips
-
Other Notes, Tips and Trivia Go Here
 Anonymous
fun fact, you can activate the first breach, go up to the observation room to the window with the audio log and using some guns you can shoot the obstruction on the portal with some annoying aiming around the wall which clears all the Nemesis from the Ward leaving you free to do everything else mostly unhindered. The enemies seemed to not be able to follow you into the room either. Devastator was able to hit it but was very wonky, managed to finish it off with the hive pistol. Might take a few ammo boxes because the aiming is really annoying to manage. I've only found a single reddit post about this from 3 years ago AFTER finding this myself, but it doesn't mention the enemies despawning aspect. If you're having trouble with the area and getting mad, just do this.

 Anonymous
This place, I kinda like it the second time around xD.
Touch the breach and ignore everything, only shoot the obstruction. No sweat.
 Anonymous
what the **** is this zone dude. The dumbass root obsrtuctions have so much ****ing health and the nemesis stay down for two ****ing seconds at a time. **** this

 Anonymous
 Anonymous
Not sure why they designed this level like that. It deviates too much from the design of the main game. Though I'm glad there is finally a useful guide on this site other than "SAMPLE TEXT HERE"

 Anonymous
 Anonymous
Maybe put it in here that it’s easier with multiple people because one can activate the breaches and another kill the obstructions.

 Anonymous
If anyone is struggling with taking too much damage while trying to destroy the "root obstructions", try using rattle weed to distract the mobs. You can go to checkpoint to refresh the mod each time too if need be.

 Anonymous
In case anyone was wondering why the password is "241351" it's because on the board, the location of "I" is 2, 4; "C" is 1,3; and "U" is 5,1.

 Anonymous
There's a bug that the portal doesn't send you to the final fight and acts like the normal rift. Sending you to the snow planet

 Anonymous

Retarded map
4
+13
-1